Tuesday 25 June 2013

*REVIEW* Nail Rock Design Nail Wraps

Hi!

I have a comparison post for you today...
I'm sure a lot of people have heard of the Sally Hansen Salon Effects Real Nail Polish Strips...but I've found an alternative in shops and I thought it would be a good time to do a review and see how they compare!
 
 
I have these pink leopard print nail strips and although I can't find a name of the design on the packaging I absolutely love it!
 
I'm a big fan of the Sally Hansen Nail Strips and I've tried 3 of those strips before, all of which I love, but these are slightly easier to find in shops.
 
The Sally Hansen nail strips retail for slightly different prices depending where you get them and which shades you get. On amazon you can find them for as much as £7/8 or as little as around £3/4.
I think in shops they are around the £5 mark.
 
On the Nail Rock website they retail for £6.65 but I got mine in TK Maxx so I got them for £3! :)
 
 
\These have the instructions printed on the back which is always useful!
The instructions for these nail wraps are almost identical for those for other nail strips.


These have a nail file and cuticle stick with them, along with "preparation wipes"...which is basically nail polish remover in a wipe form.
The Sally Hansen strips come with the file (I think the file they give is much better) and cuticle stick but while it doesn't come with the nail wipes it does tell you to wipe your nails with nail polish remover.
It is handy that Nail Rock give you the wipes included but it's not a necessity.
As I mentioned the nail file for these isn't as good quality, it's more scratchy and I don't think the shape if it works well for nails. Sally Hansen strips have a file that has different sides for different purposes, but this just has one surface which is pretty scratchy.
 
 
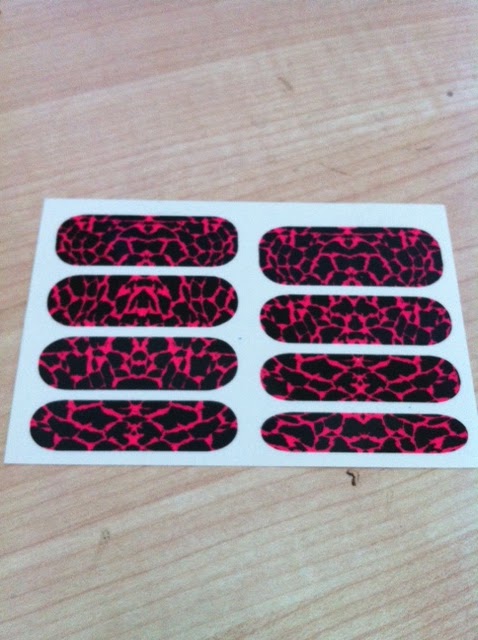
There are 16 strips here and this is one of the major advantages that these have over the Sally Hansen strips:
These don't dry out.
 
Sally Hansen strips come in 2 packets of 8 strips which are sealed. Basically, once you open that packet they start to dry out, meaning that you can't leave the ones you don't use for different occasions.
With these, you don't have to use them all at once. You could use them as an accent nail or (like I have) use them for every other nail.
It's definitely an advantage to get the strips not sealed in separate packets that dry out because you don't have to use them in one go to stop them drying out.
 
There's a good variety of sizes too; the picture doesn't show it too well but each of the 8 shapes you see above are split into two so there are 16 actual strips.
I really like the design on these, they're kind of a crackle/leopard print pink and black design.
 
 
Here I used a plain black polish from Claire's because I like having complex designs for only every other nail and it also means you can get more uses out of the polish strips! :)
 
So how did these strips apply?
 
I won't lie it was harder to apply these than the Sally Hansen ones.
These strips were harder to shape and they were more difficult to "cut" with the nail file to get the shape right.. As a result as you can see there are some nails where the strip is not quite in the right shape.
I also ended up with several creases and bubbles in the nails. I do get this sometimes with Sally Hansen strips but not as much as with these.
I think it's because these strips are less breakable and they're stronger, which makes them harder to shape and I ended up with more creases.
 
But i'm not too worried about this and I'm still pleased with the look. Because of the actual design itself, the creases don't show up too badly.
 
Now I've had them on my nails for a few days I can say that they've lasted well.
Although because they weren't so well shaped around the cuticles they didn't stick properly and started coming off a little bit.
 
I think overall I won't make an effort to go out specifically for these strips again as I just found them harder to work with in comparison to the Sally Hansen Salon Effects.
If I see a design I really like I'll pick them up because they are still pretty good and especially if I see them in TK Maxx again I'll get a couple but in terms of how they apply I prefer the Salon Effects! :)
 
I hope you enjoyed my review, have you tried the Nail Rock designs yet?
Thanks for reading!
Libby x

Sunday 23 June 2013

Makeup Look: Bright Blue Pop

Hi!

I was playing around with different shadows yesterday and thought I'd share the results with you! :)


Products used:
 
MUA Eye Shadow in Shade 12
NYX Eye Shadow Base in White
E.L.F Pigment Eyeshadow in Golden Goddess
NYX Jumbo Eye Pencil in Milk
Soap & Glory Super Cat Liquid Liner
Stila Fibre Optics Mascara
Fraulein 38 120 Pro Palette


First I applied the NYX Shadow Base, then the MUA Shadow to the outer half of the lid and the E.L.F Pigment to the inner half. I then blended the two out.
I used the black from the 120 palette to deepen the crease.
I used the NYX Jumbo Eye Pencil on the inner corner and used the silver from the 120 palette over this and also blended below the brow bone.
I lined my top lash line with the Soap & Glory liner.
I then used a trick which I learnt from Meredith Jessica, an amazing youtuber, I thoroughly recommend you check out her videos!
I used a small detail brush to carefully put some of the NYX shadow base on the bottom water line, and then topped it with the beautiful blue shade in the 120 palette. This takes a bit of concentration and a steady hand  but lasts ages on the water line and the colours show up so vibrant! Just be careful you don't get shadow in your eye like I did!
I then just added mascara!
 
So that's it! I hope you enjoyed the finished look!


Thank you for reading!
Libby x

Saturday 22 June 2013

Makeup Haul #2

Hi!

I went out this afternoon to pick up a few things and decided I'd share them with you here! :)
It's going to be my school ball quite soon so I decided to pick up a few things that I would be able to try out in time for that so I knew whether they would be good to wear on the night.

 
First I decided that I really wanted to pick up the Rimmel London Fix & Perfect Pro Primer as I'd read lots of good things about it and I needed a new face primer! I like the look of it so far - it has a nice feel to it and it was only £6.99 so not too expensive! :P
I also wanted something that would help my foundation last all of the night for my ball.
 
I needed a fairly nude lipstick for the ball and I only have one like it at the moment and I decided to try out a different shade. I picked up the 17 Supreme Shine Lipstick in the shade Bella.
I'm wearing it right now and it's a nice matte shade that is pretty close to my natural lip colour. It's a shade that I think of being "my lips but better"!
 
I tend to go through highlight colours ridiculously fast. I have a lot of darkness around my eyes that I need to brighten up so I wanted a full sized highlight shadow that I could easily grab for. Most of my highlight shades are in palettes and that makes it tricky to get out quickly unless I'm already using that palette so I got the Natural Collection Eye Shadow in Sea Shell. It looks like it will be a nice light, nude colour that should work well as a highlight colour.
 
I can never resist a new mascara.
I'm running out of my Stila Fibre Optics Mascara so I thought it was time I tried something new in case I run out completely. I was attracted to the pink tube of the Collection 2000 Super Size Fat Lash Mascara.
 
Also from Collection 2000 I picked up yet another of their Hot Looks nail polishes. They've changed the name and packaging slightly but they are still essentially the same product.
I love these polishes and I have 11 of them!
This shade is in 65 Scorched and I don't think I have anything like this in my collection at the moment. It's a bright, fiery orange red colour that is pretty unique!
 
I'm running out of a base coat at the moment so I got the Natural Collection Nail Polish in the shade Crystal Clear. It isn't marketed as a base coat but I know from experience that just a clear shade acts as a base coat for me - I don't feel like I need anything fancy :)
 
I simply couldn't resist the Barry M Nail Paint in Teal 334 when I saw it.
I love teal as a colour in general (I'm wearing teal eye liner at the moment!) and so I thought this was a beautiful colour and I cant wait to wear it on my nails.
 
So that's it! I hope you enjoyed my haul post :)
Thank you for reading!
Libby x

Friday 21 June 2013

How To Create A Smokey Eye Of Any Colour!

Hi!

I've always found that your basic smokey eye looks great on everyone - no matter your eye colour, hair colour or skin tone.
I decided to just compile a few of my favourite tips for creating a smokey eye and some products as its something that I know a lot of people find daunting! :)

Basic Technique:
 
With a good smokey eye its all about having a gradient. You want a mid toned colour, a dark colour and a lighter colour and if blended correctly, these will combine to create an amazing, smouldering smokey eye!
 
The most common colour for this type of eye look is black, combined usually with a silver/charcoal colour and a light colour for a highlight.
 
Basically....you want the darkest colour closer to your lash line, the middle colour all over your lid, and then the lightest colour as a highlight under the brow bone and on the inner corner, near the tear duct. You can also add the darkest colour into the crease and the "outer v" for extra smokiness and definition. Smokey eyes also go great with some smudged liner on the bottom lash line and waterlines and a good couple of coats of mascara!

 
Here is a picture to illustrate where you want the shadows...basically the darkest red naturally is representing the darkest colour in your smokey eye, the red the middle colour and the orange is the lightest colour.
 
Products:


This Bourjois Eye Shadow Trio in 01 is really great for creating your classic black smokey eye...
 
 
I created this simple smokey eye using the Bourjois shadows - this trio is so useful and I remember using this way back when I was just getting into makeup!
 
 
These are some swatches of the Bourjois trio.
 
 
If you want more intense colours, you can layer them over a base. These NYX Jumbo Eye Pencils are great for that, and these shades are perfect for a black smokey eye. The black shade is Black Bean, the silver (acting as the middle shade) is Pots & Pans and then the white is the lightest colour and is called Milk.
I've done a review of these HERE if you want to have a read & a closer look.
 
 
Here are swatches of the NYX Jumbo Eye Pencils! :)
I've found the best way to apply these is using a small synthetic brush and then smudging them out with your finger.  They will crease if you put on too much so be careful, but they will intensify your shadows.
Another option is the E.L.F Cream Eye Shadow Duos...
 
I have them in Black Liquorice and Coffee & Cream and they are also good for creating different looks.
Now for some different coloured smokey eyes besides your typical black smokey eye...
 
1) Brown Smokey Eye
 
This looks great on everyone. It's less intense than a black smokey eye but works well for work or for more everyday purposes.
You can use mattes if you prefer, but I personally love combining bronzes and golds to create a brown smokey eye.
 
For these types of looks, I love using the famous Urban Decay Naked Palette. It's simply beautiful and you can create a load of different looks.
 
 
I won't lie I have no idea why this is upside down. I tried to rotate it but it didn't work...anyway I'm sure you get the gist!
 
 
For the purposes of a brown smokey eye I'd recommend using the colours Sin, Smog and Darkhorse but of course there are endless options!
 
2) Deep Red/Pink Smokey Eye
 
I thought i'd show you something that was a little different to the usual types of smokey eye.
For a great deep pink or red smokey eye I love using the Too Faced "The Man Eater" palette.
Mine is quite old and I only use the shadows in this palette but they are great!
 
I haven't found names for these shadows but they are soft, pigmented and look beautiful.
You can really smoke out that deep wine red shade and make it as dramatic as you want.
This makes a really different alternative for a smokey eye.
 
 
3) Green Smokey Eye???
 
I thought I'd throw in something completely random here.
I recently tried out a green coloured smokey eye that I loved!
 
This is the Urban Decay Book Of Shadows 3 that came out a couple of years ago. I think you may still find this circulating around the internet and also some of the shades are in other palettes too so you don't need this identical palette for a green smokey eye.


These are the colours (from top) Loaded, Kush and Money.
These shades are amazing and look really good smoked together.
 
4)....Any other colour you can think of! :)
 
A great way to create a load of different looks is to get a huge palette full of different colours. From this, you can create any coloured smokey eye you want!
 
This is the 120 Pro Palette which you can easily find on Amazon or Ebay...They are sold under different brand names but they are all the same palette - the company just put their logo on the same products.
 
 
This is the Coastal Scents 88 Original Palette which is also really great.
 
Basically as long as you can get a light, medium and dark shade and apply them in the way I mentioned earlier you can create a smokey eye using any colours you want. You can make it as dramatic as you want or not! :)
 
 
I hope this post has been useful...sorry it's so long!
Thank you very much for reading if you managed to get to the bottom of this! I hope I've been able to show you some products that are useful and also how to apply them.
 Libby x

Saturday 15 June 2013

Makeup Look: Golden Goddess (E.L.F)

Hi!
 
Recently I reviewed the E.L.F Eye shadow Pigments in Golden Goddess and Baked Brown and the other day I also created a look using both of them, so I thought I'd post it so you can see them both in action!
 
If you want to read a review of the eye shadow pigments from E.L.F that I recently reviewed, you can see it HERE.  I have swatches there of the colours which might be easier to see than actually the eye!
 
I named this look after my favourite of the two pigments..."Golden Goddess" as I just LOVE that colour! I'm such a sucker for gold shadows/pigments.


Again apologies for the photo qualities...here in the UK with no sunlight it is pretty difficult to get the colours to show up properly!
 
Here are the products I used:
 
 
NYX Eye Shadow Base in White
E.L.F Eye Shadow Pigment in Baked Brown
E.L.F Eye Shadow Pigment in Golden Goddess
MUA Eye Shadow Pearl in Shade 2
Borjois Khol & Contour Eye Liner in Ultra Black
Soap & Glory Supercat Liquid Black Eyeliner Pen
Benefit High Beam
L'Oreal Lash Architect 4D Mascara
 
 
I first used the NYX shadow base then patted Baked Brown on the outer corner of the eye and Golden Goddess on the inner half of the lid. I patted them to blend them together.
I used the MUA Shadow near the tear duct to brighten the darkness that I have there.
I used the Benefit High Beam as a highlight below my brow bone (I really like using this as a highlight there, it just catches the light beautifully) and then lined my waterlines with the Bourjois eye liner.
I lined my top lashline with the Soap & Glory pen liner. This is the first (and to date only) make up product that I've tried from Soap & Glory but I love this. So easy to use and I've used it hundreds of times and it hasn't been used up yet. It's one of my most used eye liners ever.
I then added the L'Oreal mascara to my lashes; I've had this a while and I'm trying to use it up at the moment.
 
So that's it! Quite a quick and relatively easy look today, not involving any tricky blending or bright shadows. It's a variation of my typical bronze/gold smoky eye look that I use as my "signature" look all of the time.
I adore the colour of the E.L.F pigment in Golden Goddess!
Be sure to check out my review of them if you're interested!
 
I hope you enjoyed this look! :)
Thank you for reading!
Libby x

Wednesday 12 June 2013

Makeup Look: Pink Metal

Hi! :)
 
I've been recently using my 120 pro palette from Fraulein 38 a lot recently and today I decided to take advantage of some of the pink shades in there. Pink isn't usually a colour I tend to go for so I decided to also mix it in with some charcoal colours and of course black!
The result is quite a smoky eye with a bright pop of pink and quite heavy liner.


I'm just going to apologise the quality of the pictures today...there is literally NO sunlight here and its difficult to make the colours show up as bold as they are!
I did take a couple more photos but they were so dark I decided not to use them as you could hardly see anything on them anyway!
 
Here are the products I used:
 
 
E.L.F Eyelid Primer
Bourjois Khol & Contour Eyeliner in Ultra Black
NYX Jumbo Eye Pencil in Milk
NYX Jumbo Eye Pencil in Pots & Pans
Sleek Ink Pot Gel Liner in Dominatrix
Stila Fibre Optics Mascara (forgot to photo again...:P)
120 Pro Palette
 
 
Here are the colours that I used in the 120 pro palette.
 
I applied the E.L.F primer and then added the NYX Milk pencil to my inner corner and also a bit on the outer corner. I filled in the gap between with the Pots & Pans NYX pencil.
I used the mid toned, metallic grey colour (fourth colour on the top row in from the right) and blended this with the silver next to it (fifth on top row from right, the one that I've hit pan on).
I then took the pink shades and created a gradient on the outer half of the lid, patting it to blend in with the metallic grey colour.
I took a small detail brush and took the black shadow and added it to the crease and blended it out. I then went back over the pink with the deep charcoal grey (right next to the black which I've hit pan on) after deciding that it needed to be a bit darker.
I then went back over with the darker pink colours to make the pink pop more.
I swept the light silver colour under the brow bone.
I lined the top lash line with the Sleek gel liner and winged it out and then added the Bourjois pencil liner to the water line.
I then finished with mascara!
 
Sorry for the explanation that may be a little complex, basically as long as you use the same shades I've circled above you will get a similar look!
 
I hope you enjoyed this look & thank you for reading!
Libby x

NYX Jumbo Eye Pencils VS Barry M Super Soft Eye Crayons

Hi!

The NYX Jumbo Eye Pencils are already pretty well known throughout the makeup world but long before I discovered them I was using the Super Soft Eye Crayons from Barry M....I thought I'd write this post to see how they compare to each other.
Both are marketed as large, creamy liners and so it only seems natural to make a comparison!


I have 3 NYX Jumbo Eye Pencils in the shades (left to right)
Pots & Pans
Milk
Black Bean
 
 
I then have 2 Barry M Super Soft Eye Crayons in (again left to right)
No. 5
No. 1
 
 
NYX says: "A radiant eye liner that also doubles as an eye shadow. Made with a blend of mineral oil and powder, our creamy Jumbo Eye Pencils glide on effortlessly no pulling, tugging or fading and come in a rainbow of vivid hues. Some call her chubby. We say voluptuous. Available in 28 shades."
 
Barry M says:  "Jumbo sized pencils with an extra soft formulation and a thicker application in a variety of shimmering and matt colours."
 
 
Here are some swatches of them all. From the top they are:
 
NYX Black Bean
NYX Pots & Pans
NYX Milk
Barry M No. 1
Barry M No. 5
 
As I have black shades from both brands I also thought I'd show  them side by side for a more direct comparison:
 
 
The top is the NYX the bottom is the Barry M.
Here are some similarities and differences between the brands:
 
Similarities:
 
  • Both brands are budget brands or drugstore brands.
  • Both liners are very soft and creamy
  • They are both thick formulas
  • They can both be used as bases
  • They both come in shimmer & matte
  • Both are very large pencils (roughly the same size)
 
Differences:
 
  • The Barry M is cheaper at £3.99 compared to £4.50 for NYX.
  • Barry M is much easier to get hold of if you're in the UK as its found in drugstores over here; NYX is probably easier to get hold of in the US.
  • NYX comes in 28 shades...from the Barry M website there are only 5 shades available. I have seen more than five in actual drugstores but I'm fairly certain there are not as many as 28.
  • In terms of texture, the NYX is creamier and "wetter". You can see this in the swatch of the two black shades, the NYX is on the top and you can clearly see the "shine" on it.
  • Barry M is more of a "crayon" texture (as the name would suggest...)
  • I feel that the NYX is slightly more pigmented as it takes less strokes to make it completely opaque.
  • The Barry M could probably be used on it's own and it wouldn't be SO essential to set it with a shadow. I'd still recommend you do this, but its not 100% essential as it's a drier formula. The NYX is far too creamy to be left on it's own.
  • I would say that the NYX works marginally better as a base because its creamier and stickier, but it is also harder to use because of this. It can get slightly messy.
 
 
Overall...these are both really good products and I'm not for a second going to say that I don't like either of them.
I think most of it depends on where you live...if you're in the US the NYX is going to be much easier to find and if you're in the UK the Barry M is going to be easier to find.
Generally..i think I do prefer the NYX simply because it is creamier and so clings to shadows better when you're using it as a base.
I also find that the colours I have for the NYX pencils are more useful. The Milk shade that I have gets used so much its now very short. While the black shade in Barry M is very useful the lilac shade isn't as versatile so I just don't get as much use out of it.
I do generally use the NYX pencils more although if I was in a rush I would definitely "trust" the Barry M more, because as its drier there is less chance of making a mess.
They are both very pigmented and have some great colours although NYX does have more.
 
Personally, I'd buy more of either brand! Maybe I'll get another Barry M pencil in a white shade, as it would be slightly harder for me to repurchase my NYX pencil in Milk if and when it runs out!
They are both really great products in their own right though!
 
Thank you for reading! Have you tried either of these products?
Libby x